The Lushprojects simulator is a Javascript port of the Java-based Falstad simulator. Running Java in a college environment is sometimes problematic so this port is really useful. No bribery of your IT support department will be needed. The Lushprojects site advertises its own electronics projects. This is a small price to pay.
Lushprojects (Originally Falstad) Simulator Video Guide - 7 Minutes
A couple of seconds of audio are missing from the start.
Oscilloscopes are easy to add but not shown in the video.
Lushprojects is a Falstad simulator port to JavaScript and HTML5.
Highly recommended!
To add a component, right click and select from the lists or use a hot key (listed below).
Use the mouse to drag the selected component to the right position, set its size and also its orientation.
To add several components of the same type, choose it once and drag into several positions.
To shift a component, hold down the shift key, point near the middle and drag the component or wire to its new position.
To resize or re-orient a component, hold down the control key and drag one end of it to its new position.
To reposition an entire circuit, hold down the Alt key and drag the background with the mouse.
To un-do a mistake, use CTRL+Z
To delete a component, right click it and select Delete.
To change a component value, right click it and select Edit.
Use k for kilo, n for nano, p for pico, M for mega, m for milli. Examples: 3n gives three nanofarads. 10k gives 10 kilohms.
To join components with wires, press the w (wire) key and drag out the wires between the components.
Red dots on the wires indicate missing connections. Wires must be connected end to end and never in the middle.
Crossing wires do not join each other.
To join wires, their ends must meet without a red dot.
You can't connect to the middle of a wire.
Use a lot of short wires to connect multiple components (often to the ground or positive lines).
Some Keyboard Shortcuts
Press the chosen key once.
Then click and drag the mouse to position and set the size and orientation of the component.
Repeat the mouse drag for more components if needed.
It's easy to add unwanted components by mistake. Use CRTL+Z to undo the accidental addition or any other mistake.
w
Add wire/s
r
Add resistor/s
c
Add capacitor/s
L
Add inductor/s
s
Add switch/s
S
Add SPDT switch/s
R
Add relay/s
g
Add ground connection/s
v
Add two terminal voltage source/s (battery for example)/
V
Add one terminal voltage source/s
l
Add LED/s
t
Add text label/s
d
Add diode/s
z
Add Zener diode/s
n
Add NPN transistor/s
p
Add PNP transistor/s
N
Add N channel MOSFET/s
P
Add P channel MOSFET/s
a
Add Op Amp with - on top/s
A
Add Op AMp with + on top/s
i
Add Logic input/s
o
Add Logic output/s
1
Add Inverter (NOT Gate)/s
@
Add NAND Gate/s
#
Add NOR Gate/s
2
Add AND Gate/s
3
Add OR Gate/s
4
Add XOR Gate/s
Oscilloscopes - Useful
Right click any wire or end of a component and select View in Scope. Right click a scope to change its settings.
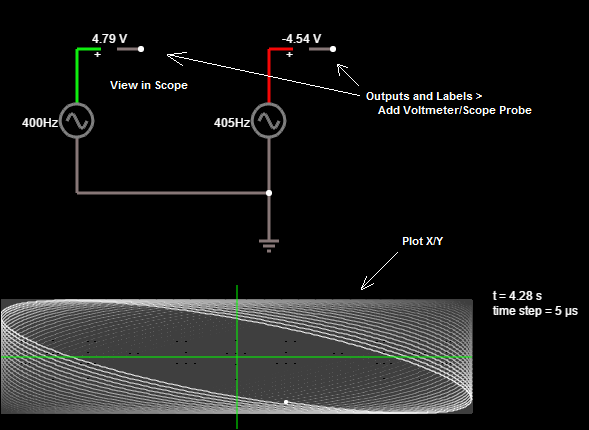
Oscilloscopes - XY Plot
How to get an X/Y oscilloscope plot. I found you needed to use two Voltmeter/Scope Probes.